![Nav Support Center.svg]](https://help.foodnotify.com/hubfs/Support%20Center/Design/Nav%20Support%20Center.svg)
Your FoodNotify account has three levels:
- Company: your business with its contact details and VAT number.
- Locations: your sites, for example individual restaurants. You assign recipes to one or more locations and can limit user permissions to individual locations.
- Cost centers: areas within a location, for example kitchen and bar. You assign orders and goods to individual cost centers.
Click your name at the bottom of the sidebar, then Business information. At the top you see the three tabs Company, Locations and Cost centers.
Company
In the Company tab you keep your business details up to date: logo (JPG or PNG, up to 10 MB), company name, contact person, phone, VAT number, address and country. Click Save when you are done.
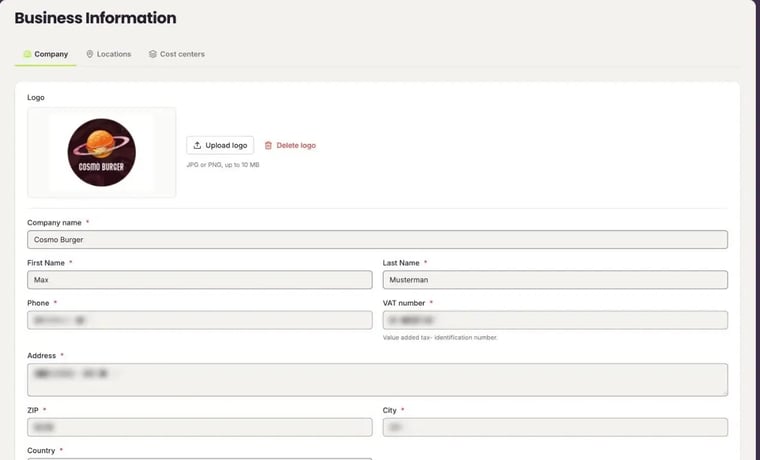
FoodNotify checks your VAT number when you save. It has to start with the country code, for example AT for Austria or DE for Germany, and match the selected country. If the EU validation servers are not available, try again in a few minutes. More: Why do I have to provide my VAT number?
Locations
The Locations tab lists all your locations with their languages, cutoff time and number of cost centers. The location marked Default is used when no other location is selected.
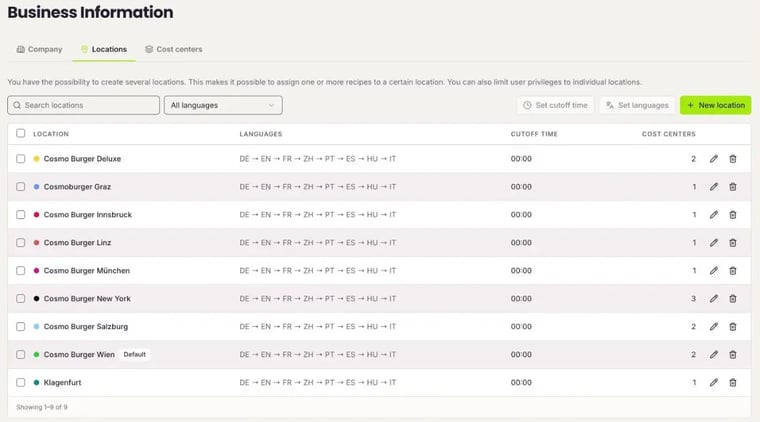
- New location adds another location. How many locations you can create depends on your license. If you need more, contact our support.
- Use the pencil to edit a location and the bin to delete it.
- To change several locations at once, tick them on the left and choose Set languages or Set cutoff time.
Editing a location
A location has three tabs:
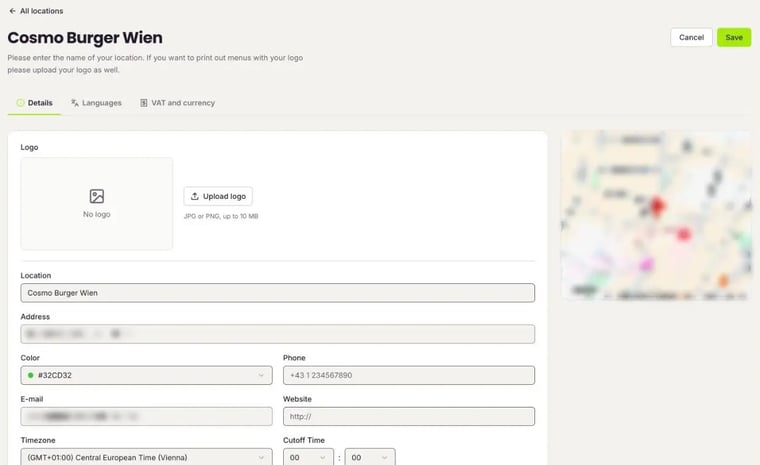
- Details: logo, name, address, color, phone, email, homepage, timezone and cutoff time. The logo appears when you print menus. The color helps you spot the location in lists.
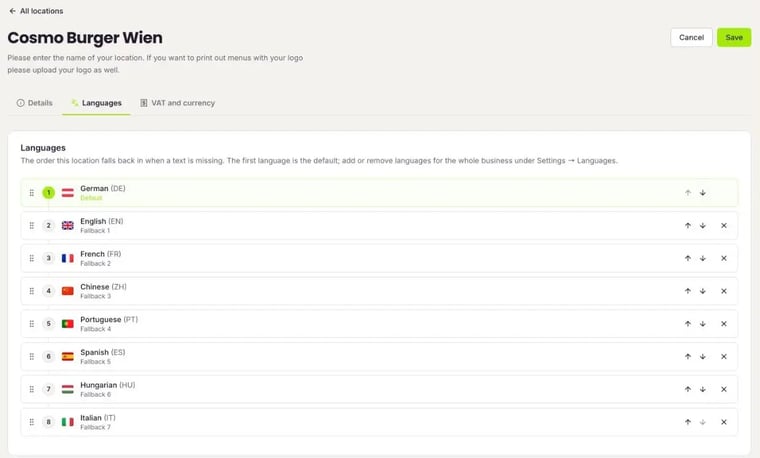
- Languages: the order in which the location falls back to other languages when a text is missing. The first language is the location's default language.
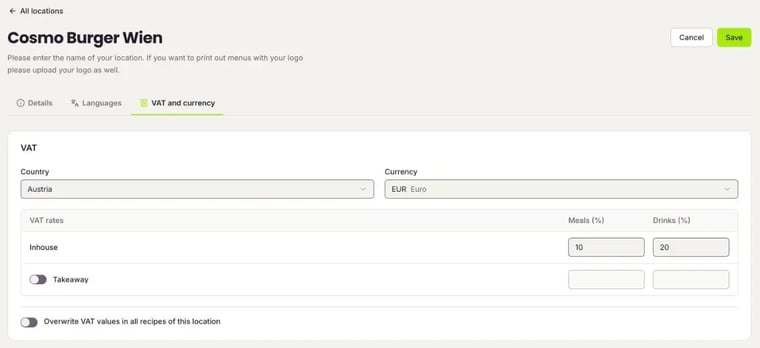
- VAT and currency: country, currency and the VAT rates for food and drinks, separately for inhouse and takeaway.
Click Save at the top right when you are done.
Languages of a location
In the Languages tab you set the order in which the location falls back to other languages when a text is missing. The first language is its default language, the others are fallback languages. Use the arrows or drag and drop to change the order. Which languages exist across your whole business is set under Settings › Languages.
What is the cutoff time?
The cutoff time sets when your business day starts. Everything from this time on counts towards the current day, everything before towards the previous day. If your bar closes at 2 a.m., for example, set the cutoff time to 4:00. Sales until 2 a.m. then still count towards the evening before.
If you change the cutoff time, the previous one still applies until the end of the current business day.
VAT and takeaway
In the VAT and currency tab you enter the VAT rates in percent. If you also sell food to go, switch on Takeaway and enter the rates for it. With the switch Overwrite VAT values in all recipes of this location you apply the rates to all recipes of the location.
Deleting a location
You can only delete a location when no recipes, menus or buffet cards are assigned to it anymore. At least one location has to remain.
Cost centers
The Cost centers tab lists all cost centers with their location and internal note. Use All locations to filter by location.
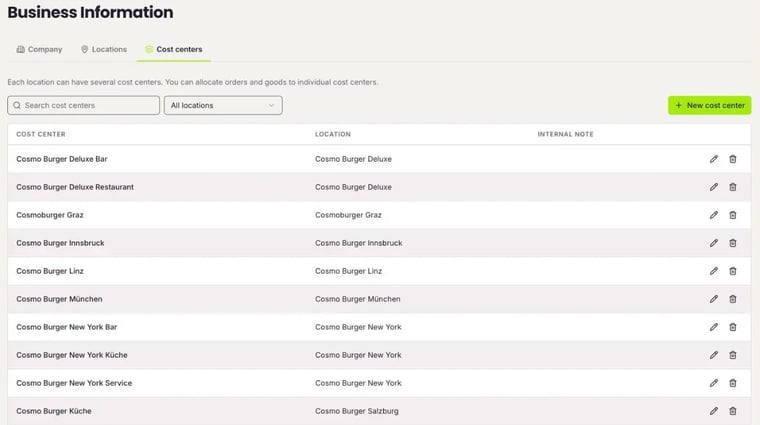
- Click New cost center.
- Enter a Name and choose the Location.
- Add an Address and an Internal note if you like.
- Click Save.
Use the pencil to edit a cost center. If you choose a different location there, you move the cost center to it. Every location needs at least one cost center, so you can neither delete nor move the last one.
What next?
- Create users and give them access to locations
- General settings for recipes, languages and inventory