![Nav Support Center.svg]](https://help.foodnotify.com/hubfs/Support%20Center/Design/Nav%20Support%20Center.svg)
In the catering settings you set up everything you need for events again and again. When you create an event, you then simply select it.
Open Catering and click the gear icon at the top right. On the left you find the sections Customers, Event, Templates, Location and Team. Exit settings takes you back to your events.
How to add entries
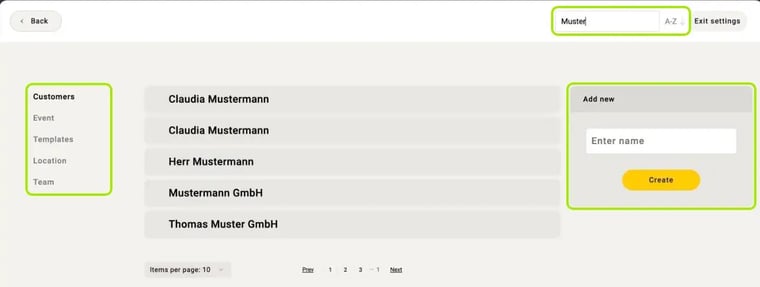
It works the same in every section: on the right, under Add new, enter a name and click Create. Use Search to find existing entries and A-Z to sort the list.
Customers
Add the customer and then click the entry. Add Name, Address, Contact person and Phone and click Save.
Event and type
Under Event you define what is being celebrated, e.g. a wedding, a company anniversary or a gala. Under Event › Type you define how it is served, e.g. buffet, banquet, seated dinner or food truck.
Meals and templates
A template is the sequence of a typical event – e.g. a wedding with a champagne reception, dinner and wedding cake. When planning, you add it with just a few clicks.
- Open Templates › Meals and add your meals, e.g. breakfast, lunch or reception. With Set time you set the start and end time.
- Open Templates and add a template, e.g. “Wedding”.
- Click the template. On the right, under Add meals, search for your meals and drag and drop them into the template. With New you create another meal directly.
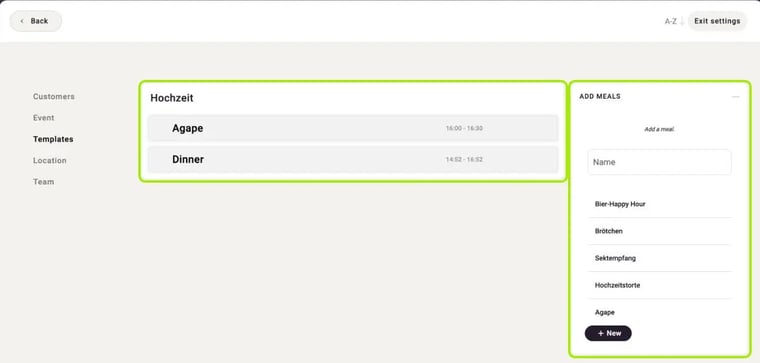
In the list of templates you see the meals of each template. To learn how to use a template in an event, see Plan the meals.
Locations
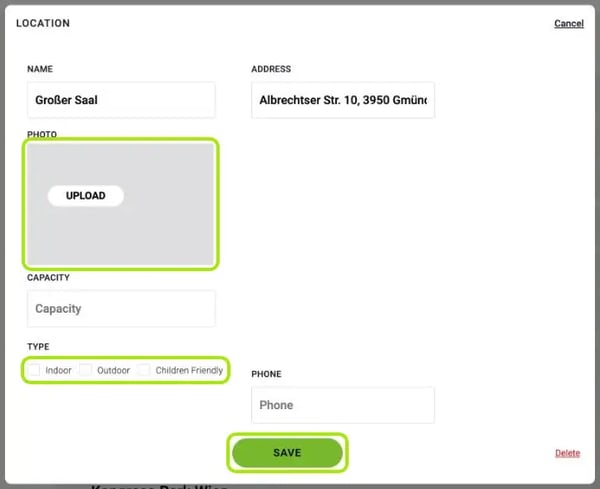
Add the location and click the entry. Add Address, Photo (with Upload), Capacity, Type (Indoor, Outdoor, Children Friendly) and Phone and click Save. The photo and address later appear on the tile of every event at this location.
Blacklist
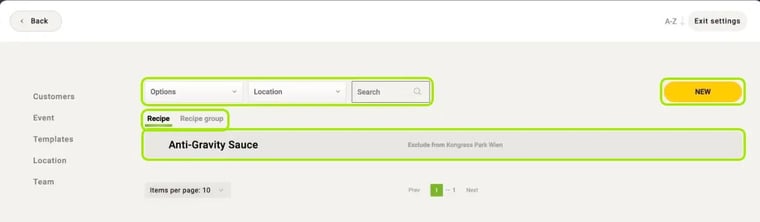
With the blacklist you exclude recipes or recipe groups for certain locations – e.g. if a dish cannot be prepared there. You either exclude a recipe from individual locations (Exclude from) or from all locations except the selected ones (Exclude from all except).
- Open Location › Blacklist and click New.
- Choose the recipe or recipe group, the option and the locations, and confirm.
In the list you see in the tabs Recipe and Recipe group what is excluded at which location. Use the filters Options and Location to narrow down the list. When you plan an event at this location, the recipe is marked as not available.
Team members and roles
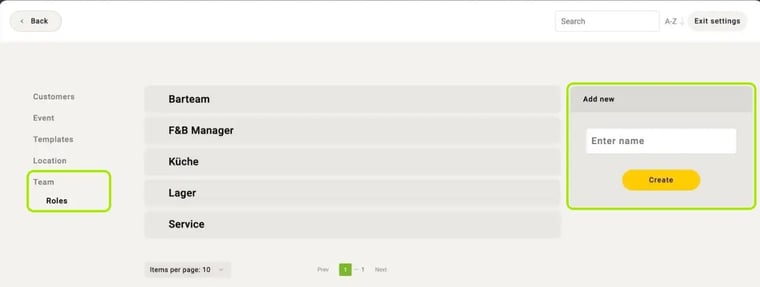
Under Team you manage everyone who works at events. You add new team members on the right with First name and Last name. Via the three dots › Edit you open a person's user data.
Under Team › Roles you create your teams, e.g. kitchen, service, bar team or storage. In the event you then assign the team members in the Team tab.