![Nav Support Center.svg]](https://help.foodnotify.com/hubfs/Support%20Center/Design/Nav%20Support%20Center.svg)
Storage locations are the places where your goods are kept, for example cold room, freezer, dry store or bar. Every product needs at least one storage location. Without one, you can't count it properly in the stocktaking.
Create a storage location
- In the sidebar, click Inventory › Global › Settings › Storage locations.
- Click Create new, enter the name and save.
- Click the storage location on the left. On the right, under Shared with, tick the locations that use it. The arrow next to a location also shows its cost centres.
- Click Save.
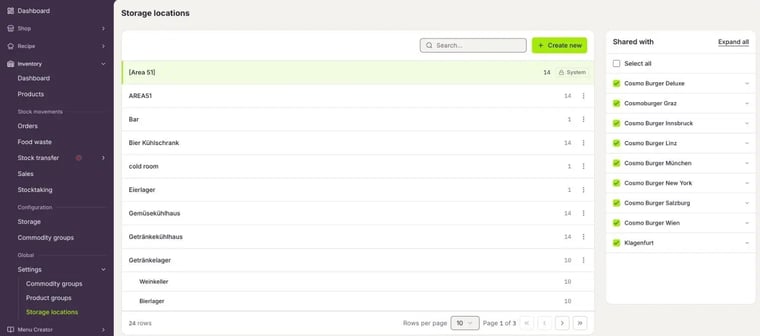
The storage location [Area 51] is created by the system. Products that are not assigned to a storage location yet end up there. You can't change or delete it.
Edit storage locations
With ⋮ next to a storage location, you can:
- Add Sub-storage, for example a wine cellar and a beer store in the drinks store,
- Rename the storage location,
- Move products: all products go into another storage location, and the old one is empty afterwards,
- Delete the storage location. This can't be undone.

Assign products to a storage location
Under Inventory › Products, you assign products one at a time with ⋮ › Edit Products or several at once with Bulk Update: How do I edit my products in Inventory?
View the storages of a location
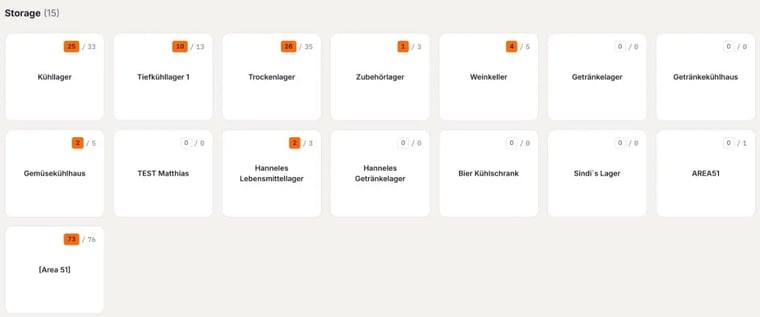
Under Inventory › Configuration › Storage, you see all storage locations of your location. At the top right of each card, you see how many products are low on stock and how many products are in the storage.
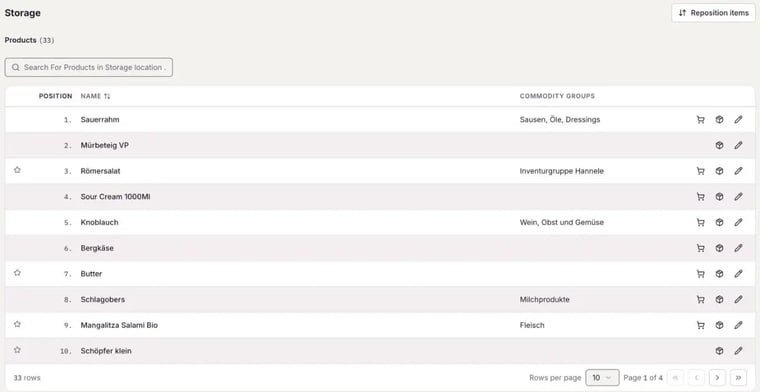
Click a storage location to see its products. With the icons on the right, you reorder, change the stock or edit the product.
Set the order for the stocktaking
In the stocktaking, the products appear in the same order as here. Set it to match how the goods are on the shelf. Then you count faster.
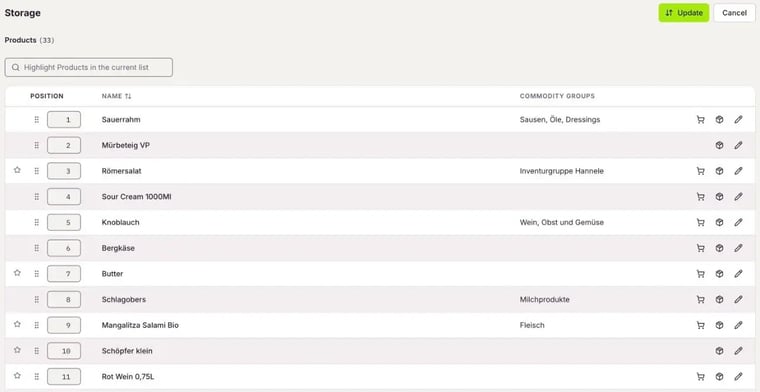
- Open the storage location and click Reposition items.
- Drag the products to the right place or enter the position directly.
- Click Update.