![Nav Support Center.svg]](https://help.foodnotify.com/hubfs/Support%20Center/Design/Nav%20Support%20Center.svg)
Roles bundle permissions into reusable templates, for example for a kitchen manager, purchasing or service. When you give a user a role, they get all its permissions. You can then still adjust them for that person.
The list of roles
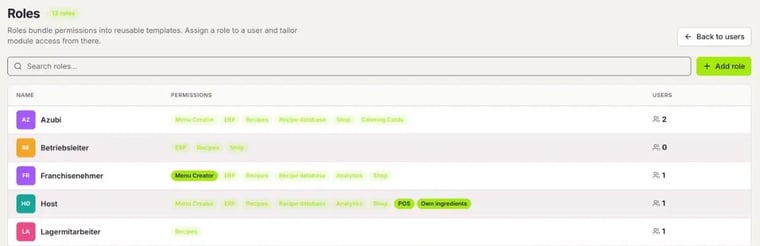
Click your name at the bottom of the sidebar, then Users and Manage roles at the top right. You see all roles with their permissions and the number of users. Solid green labels mean full access to a module, light ones partial access.
Creating a role
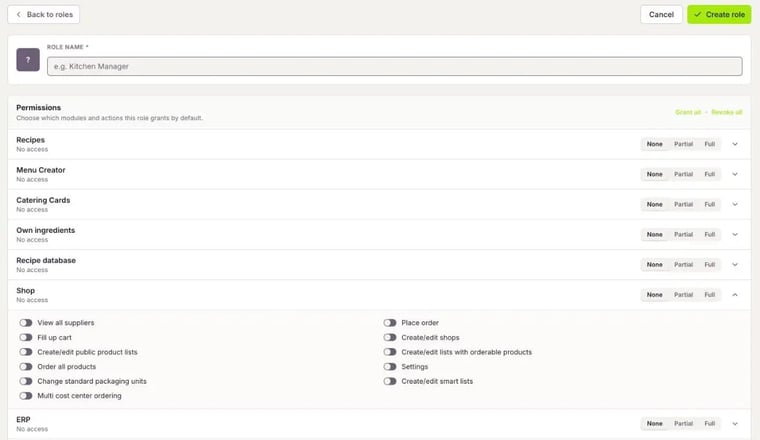
- Click Add role.
- Enter a Role name, for example kitchen manager.
- For each module, choose None, Partial or Full.
- Use the arrow on the right to expand a module and switch individual actions on or off. In the Shop, for example, these are Place order, Fill up cart or Create/edit smart lists.
- Click Create role.
Grant all and Revoke all set all modules at once.
Give each role only the rights it really needs. You can still grant individual people extra rights when you create the user.
The modules
Permissions are grouped by module: Recipes, Menu Creator, Catering Cards, Own ingredients, Recipe database, Shop, ERP, Catering, Analytics, POS and Further rights. ERP stands for inventory and POS for the cash register connection. Which modules you see depends on your plan.
Editing or deleting a role
Click Edit in the list of roles. If the role is already assigned to users, you see a notice: your changes do not apply to these users automatically. To update their permissions as well, switch on Overwrite their permissions. Then click Save changes.
You can only delete a role when no user has it anymore. Give those users a different role first.
What next?
Once your roles are set up, create your users and assign them a role.