![Nav Support Center.svg]](https://help.foodnotify.com/hubfs/Support%20Center/Design/Nav%20Support%20Center.svg)
With the weekly menu you plan which dishes you serve on which day – with portions per meal and per day.
Your weekly menus
Open Menu Creator › Weekly menu. You see all weekly menus with their period and status. At the top you filter by status and period. The copy icon copies a weekly menu, for example for the following week.
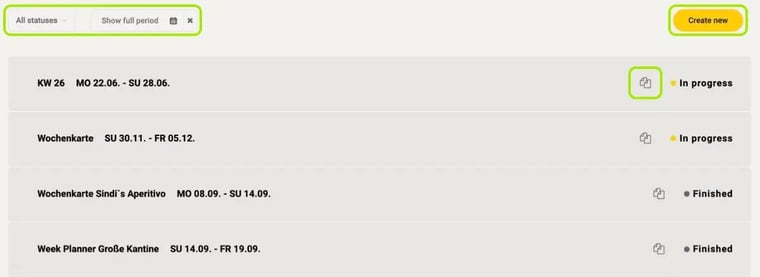
Create a new weekly menu
- Click Create new.
- Choose the period with From and To and enter a Name.
- Choose the type of headers: First column headers (grouping in rows, e.g. lunch and dinner) or Custom headers (no grouping).
- Confirm – your new weekly menu opens.
Add recipes
The days are in the columns, the meals with their times in the rows. Click the plus at the bottom of the first column to add another meal.
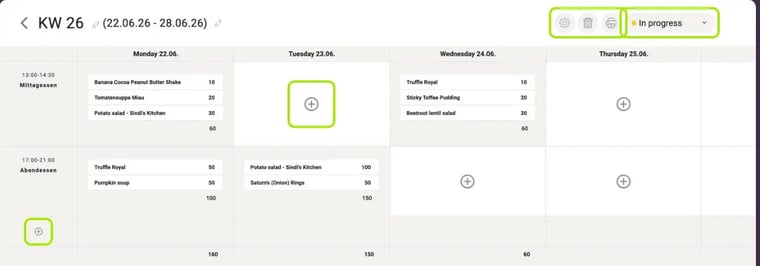
- Click the plus on a day.
- Search for the recipe under Recipe name and enter the Portions.
- Click Add new to add more recipes to the same meal.
- Click Save.
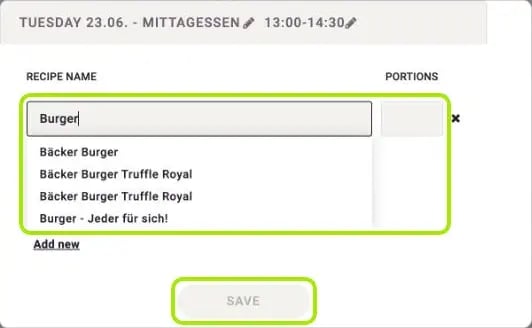
You change the name of the meal and its time with the pencils in the window title. FoodNotify adds up the portions per meal and per day automatically. With the three dots on a meal you can edit, duplicate or remove it.
Set up the display
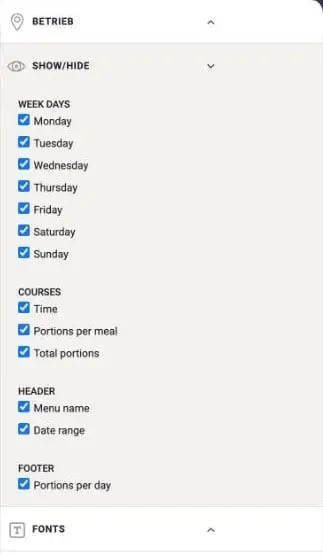
Click the gear icon at the top right. Under Betrieb you choose the location. Under Show/Hide you decide which week days, which meal details (time, portions per meal, total portions), which header (menu name, date range) and which footer (portions per day) are shown. Under Fonts you choose the font.
Print your weekly menu
- Click the printer icon at the top right. The print view opens.
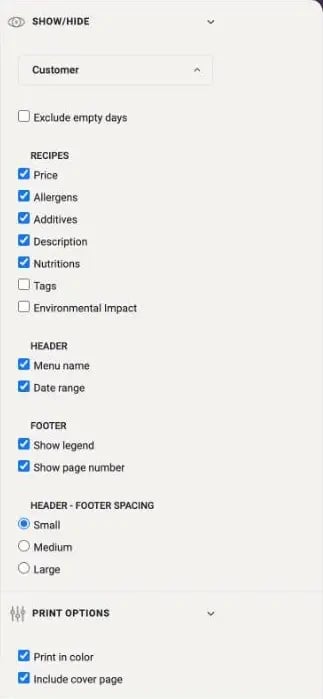
- Open the options with the gear icon. Choose the view Customer or Personnel, exclude empty days if you like and decide which recipe details are printed: price, allergens, additives, description, nutritions, tags and environmental impact. You also set the header and footer, the spacing as well as Print in color and Include cover page.
- Click Print.
Complete your weekly menu
When you have finished planning, click the status In progress at the top right and choose Complete. After that you can no longer change the weekly menu. Cancel cancels the planning. The bin deletes a weekly menu – this cannot be undone.
You see these statuses in the overview:
- In progress – you are still planning.
- Prepared – planning is complete.
- Ongoing – the week is running.
- Finished – the week is over.
- Cancelled – the planning was cancelled.
Learn more: How do I create a menu?