IMPORTANT: The POS connection is done together with our FoodNotify support and will be agreed with you in the course of the implementation. These instructions serve as a guide for this.
Before you start with the connection, please request the required data from your cash register provider.
Connect a cash register
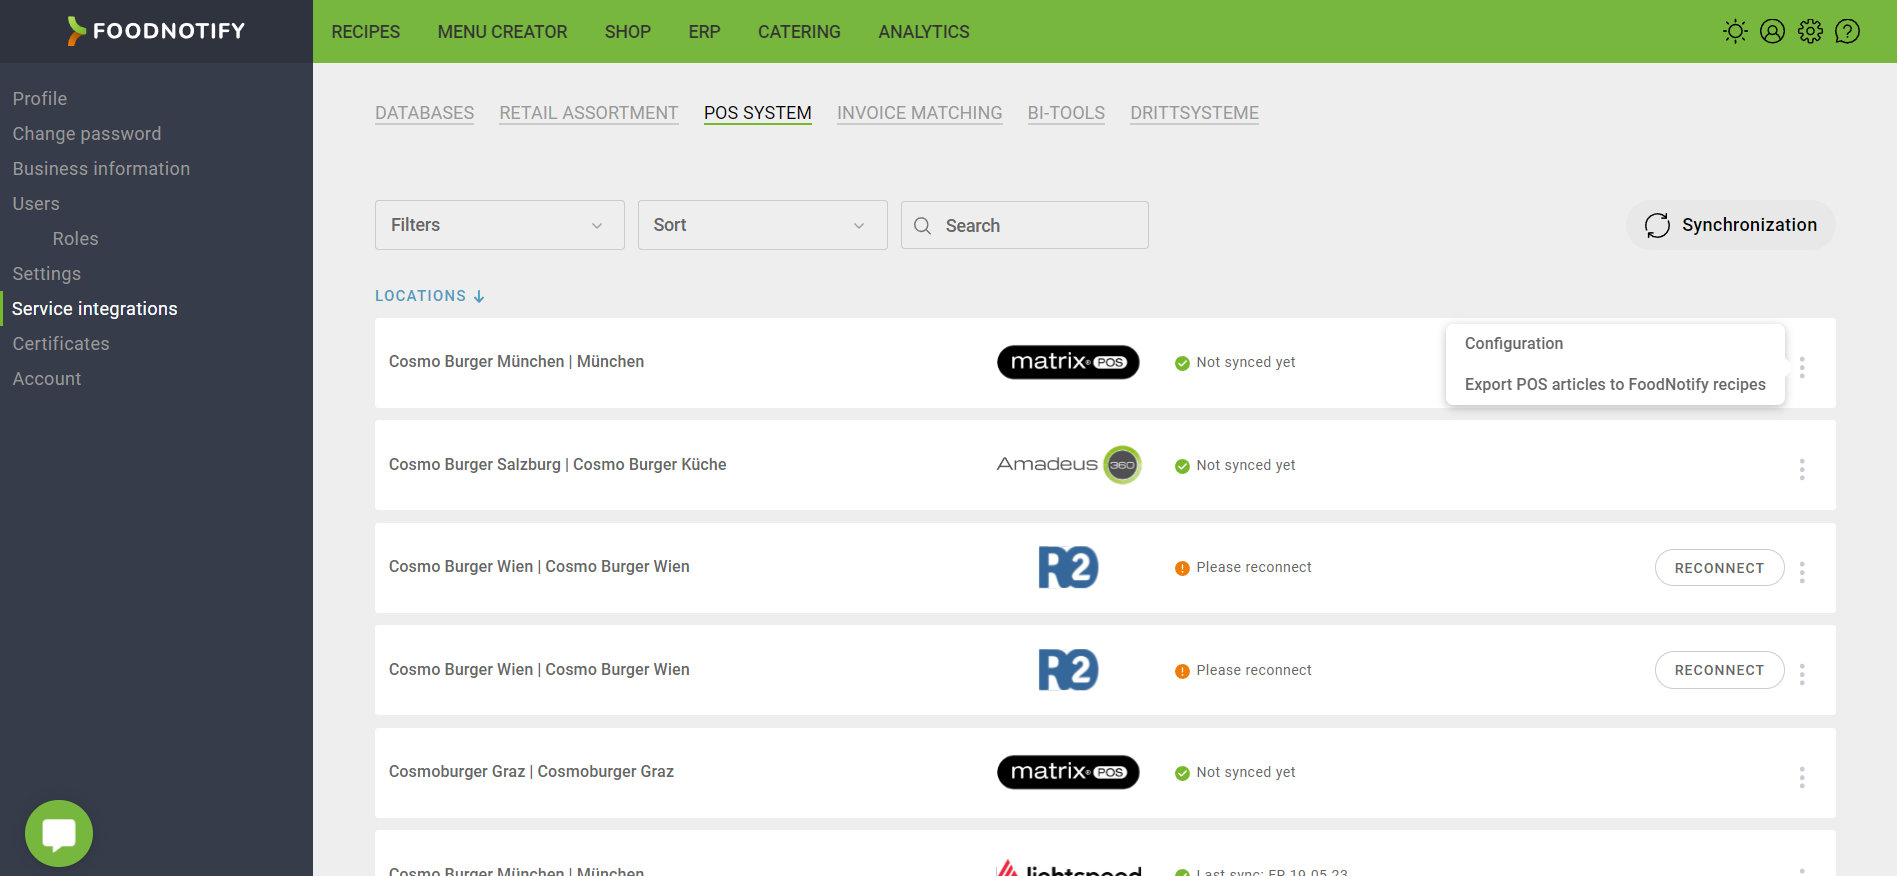
- Go to settings in the upper right corner.
- Click on "connect services" in the sidebar on the left and select "cash registers". All your cost centers for which a cash register can be connected will appear here.
- Choose the desired cost center and select your POS system and continue.
- Enter the business ID and click CONNECT. You will be redirected to your POS provider.
- Now you will return to the FoodNotify system.
- Depending on the amount of data, the transfer may take a few minutes.
IMPORTANT: If you want to connect more businesses with your POS system, please log out and then log in via an incognito window, as the site always automatically saves the data of the previous login.
Set up a connected cash register
After a register is connected, it can be configured and linked to recipes in FoodNotify.
To ensure that only the data you need is synchronized, you have the option to select this data.
- You can select which information should be transferred from your POS system to FoodNotify.
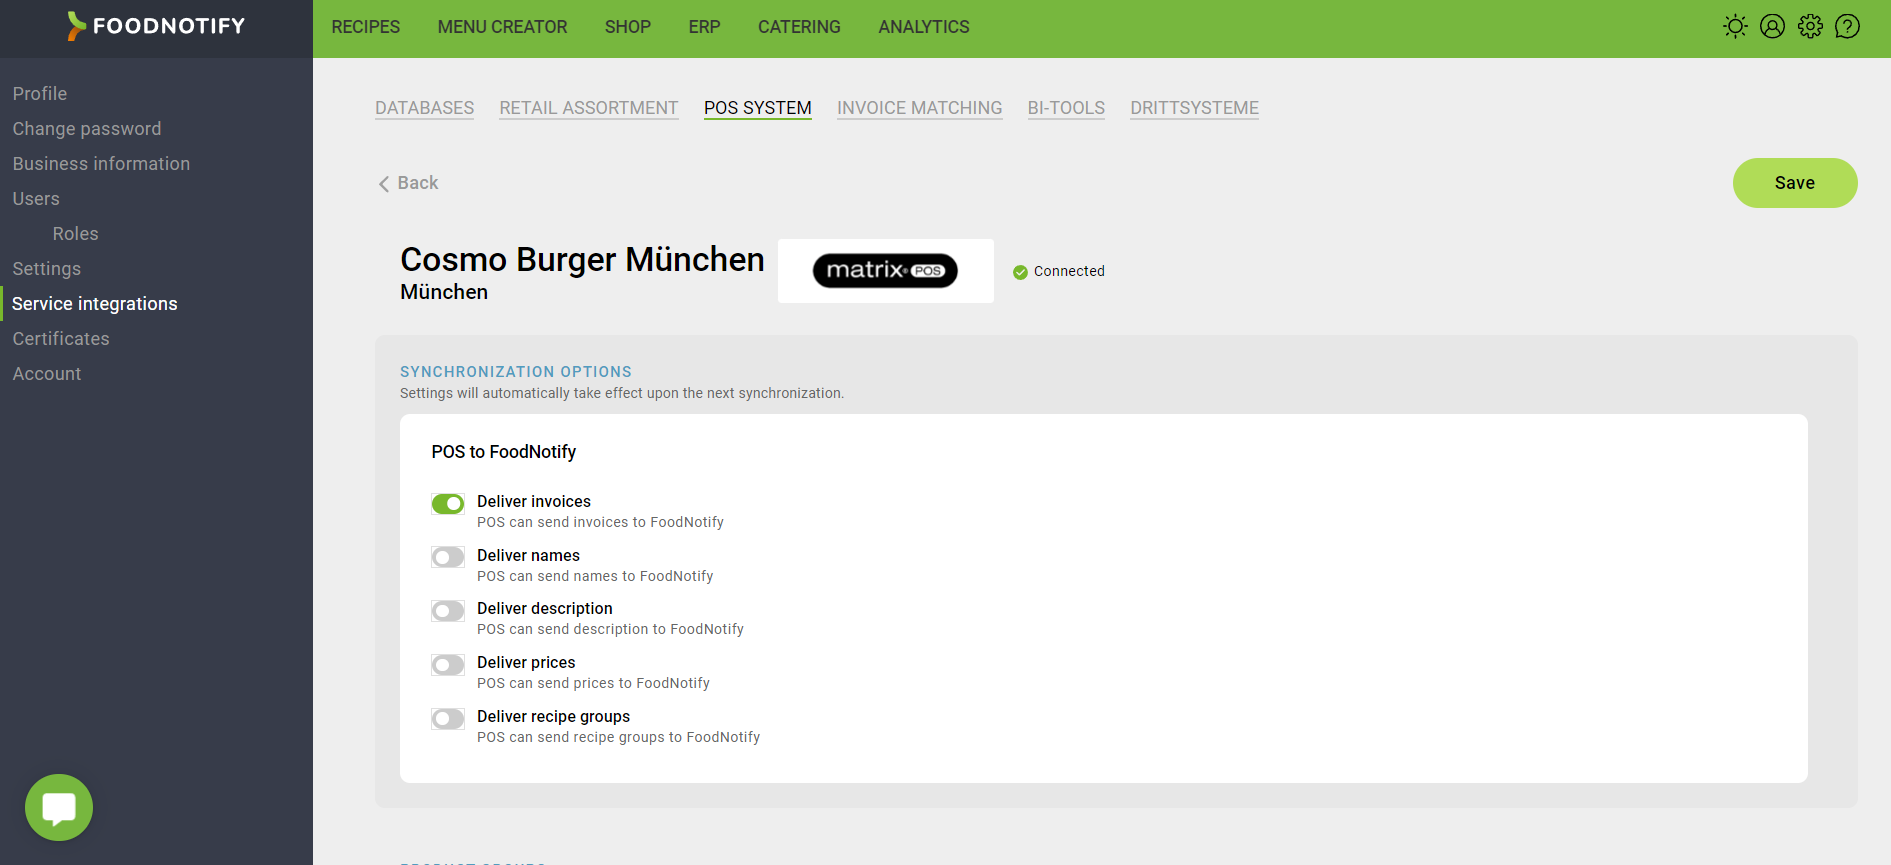
The option for invoices is usually the most relevant function, since it enables the transmission of information about the sold quantities and prices of the linked recipes.
- On the other hand you can also select which information should be transferred from FoodNotify to your POS system.
If the info is provided by the supplier, the cash register can also display allergens and additives in your recipes.
- Under "product groups" at the bottom left, you can assign the synchronisation of individual product groups of your POS system to specific cost centers.
- You want to disconnect from the POS system? This option is located at the bottom right.
Don't forget to save your settings at the top right at the end!
Connecting checkout items
Initially, there are no checkout items associated with FoodNotify.
By linking checkout items to created recipes in FoodNotify, when you sell checkout items, the ingredients used in an item are debited directly from the warehouse, which keeps your inventory levels up to date.
On the left side you see the checkout items from your POS and on the right side you see the recipes linked to them in FoodNotify.
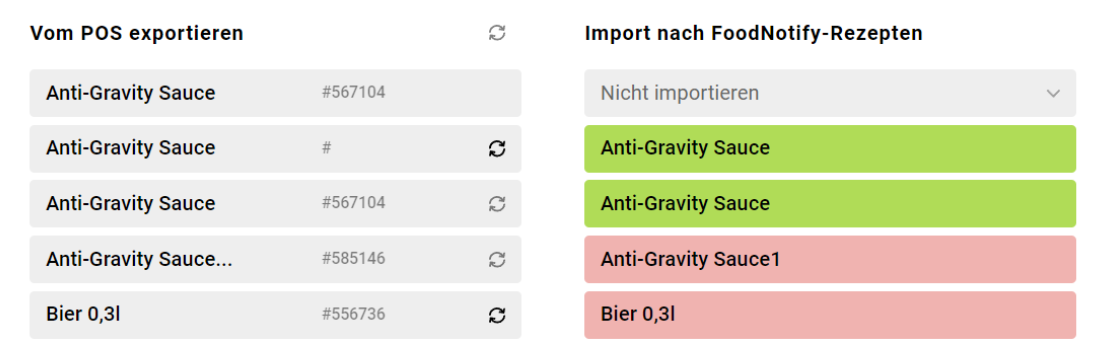
Recipes highlighted in green indicate a successful link.
Recipes with a red background indicate that an error has occurred. Click on the product to see how this happened.
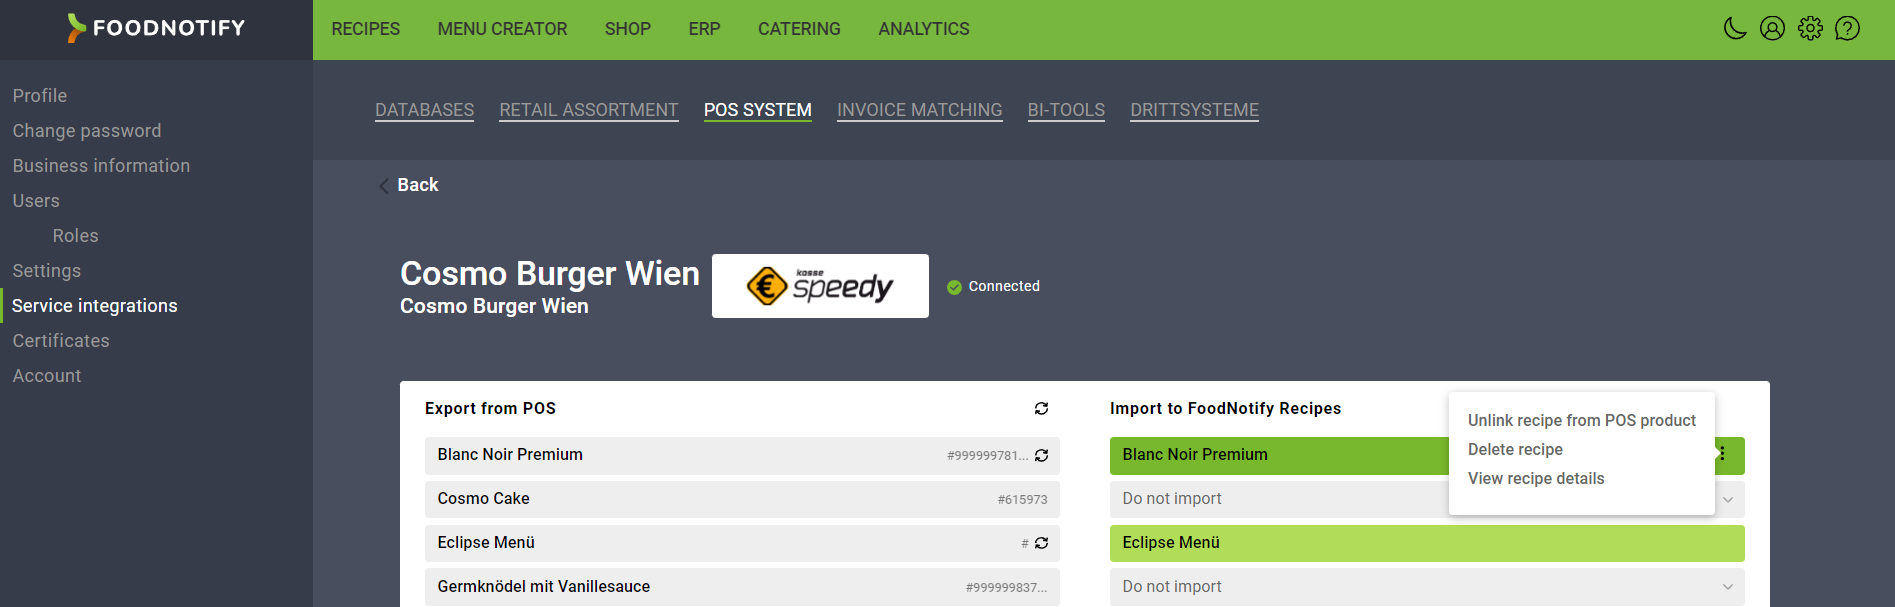
For recipes with an existing link, you have the following options:
Unlink Recipe from POS product: The link is removed and another link is now possible.
Delete recipe: The linked recipe in the recipes module can be deleted directly here. Recipes which are used as ingredient in other recipes cannot be deleted directly, but have to be removed from the master recipe first.
Show recipe details: You will be redirected to the view of the linked recipe.
Changes are saved automatically.
Manual synchronization
The synchronization of POS items can also be done manually. To do this, click on Synchronization and you will be taken to the page where the POS items are listed. Using the filter function you can select the desired location. If you move the mouse over the respective location, the name of the POS system used at this location is displayed. Clicking on the 3 dots will take you to another menu where you can "reload from POS" the articles.